Author: Jacob Smith -
After my unsuccessful launch attempt in July I wouldn’t be able to attempt another launch for at least another four weeks because I had to apply for permission from the Civil Aviation Authority again. I had a free week in mid-August so sent an application and got to work figuring out how to solve the issue I had had first time around.
What went wrong?
If you remember back to my last blog post, when I was preparing to launch my High Altitude Balloon, the signal I was receiving from my tracker was intermittent, forcing me to abort the launch. I studied this back at home and determined the likely cause was that the antenna on the underneath of the payload had been damaged. The radials must be straight and well soldered together, but having accidentally dropped the box on them once or twice, they may have been damaged. Admittedly, I had taken the easier option when making this antenna the first time, but clearly it wasn’t reliable. So, with the help of my mum who sat night after night painstakingly unbraiding 20cm of insulation from a coax cable, we made what we hoped would be a more robust antenna (basically it was all one piece rather than 3 pieces soldered together). I also re-soldered some of the old connections on the circuit board, which could have also contributed to the issues I had. Next was a trip to the local lake to test the new antenna. And…success! I was really pleased that it produced a clear constant signal that I was able to pick up from the other side of the lake.
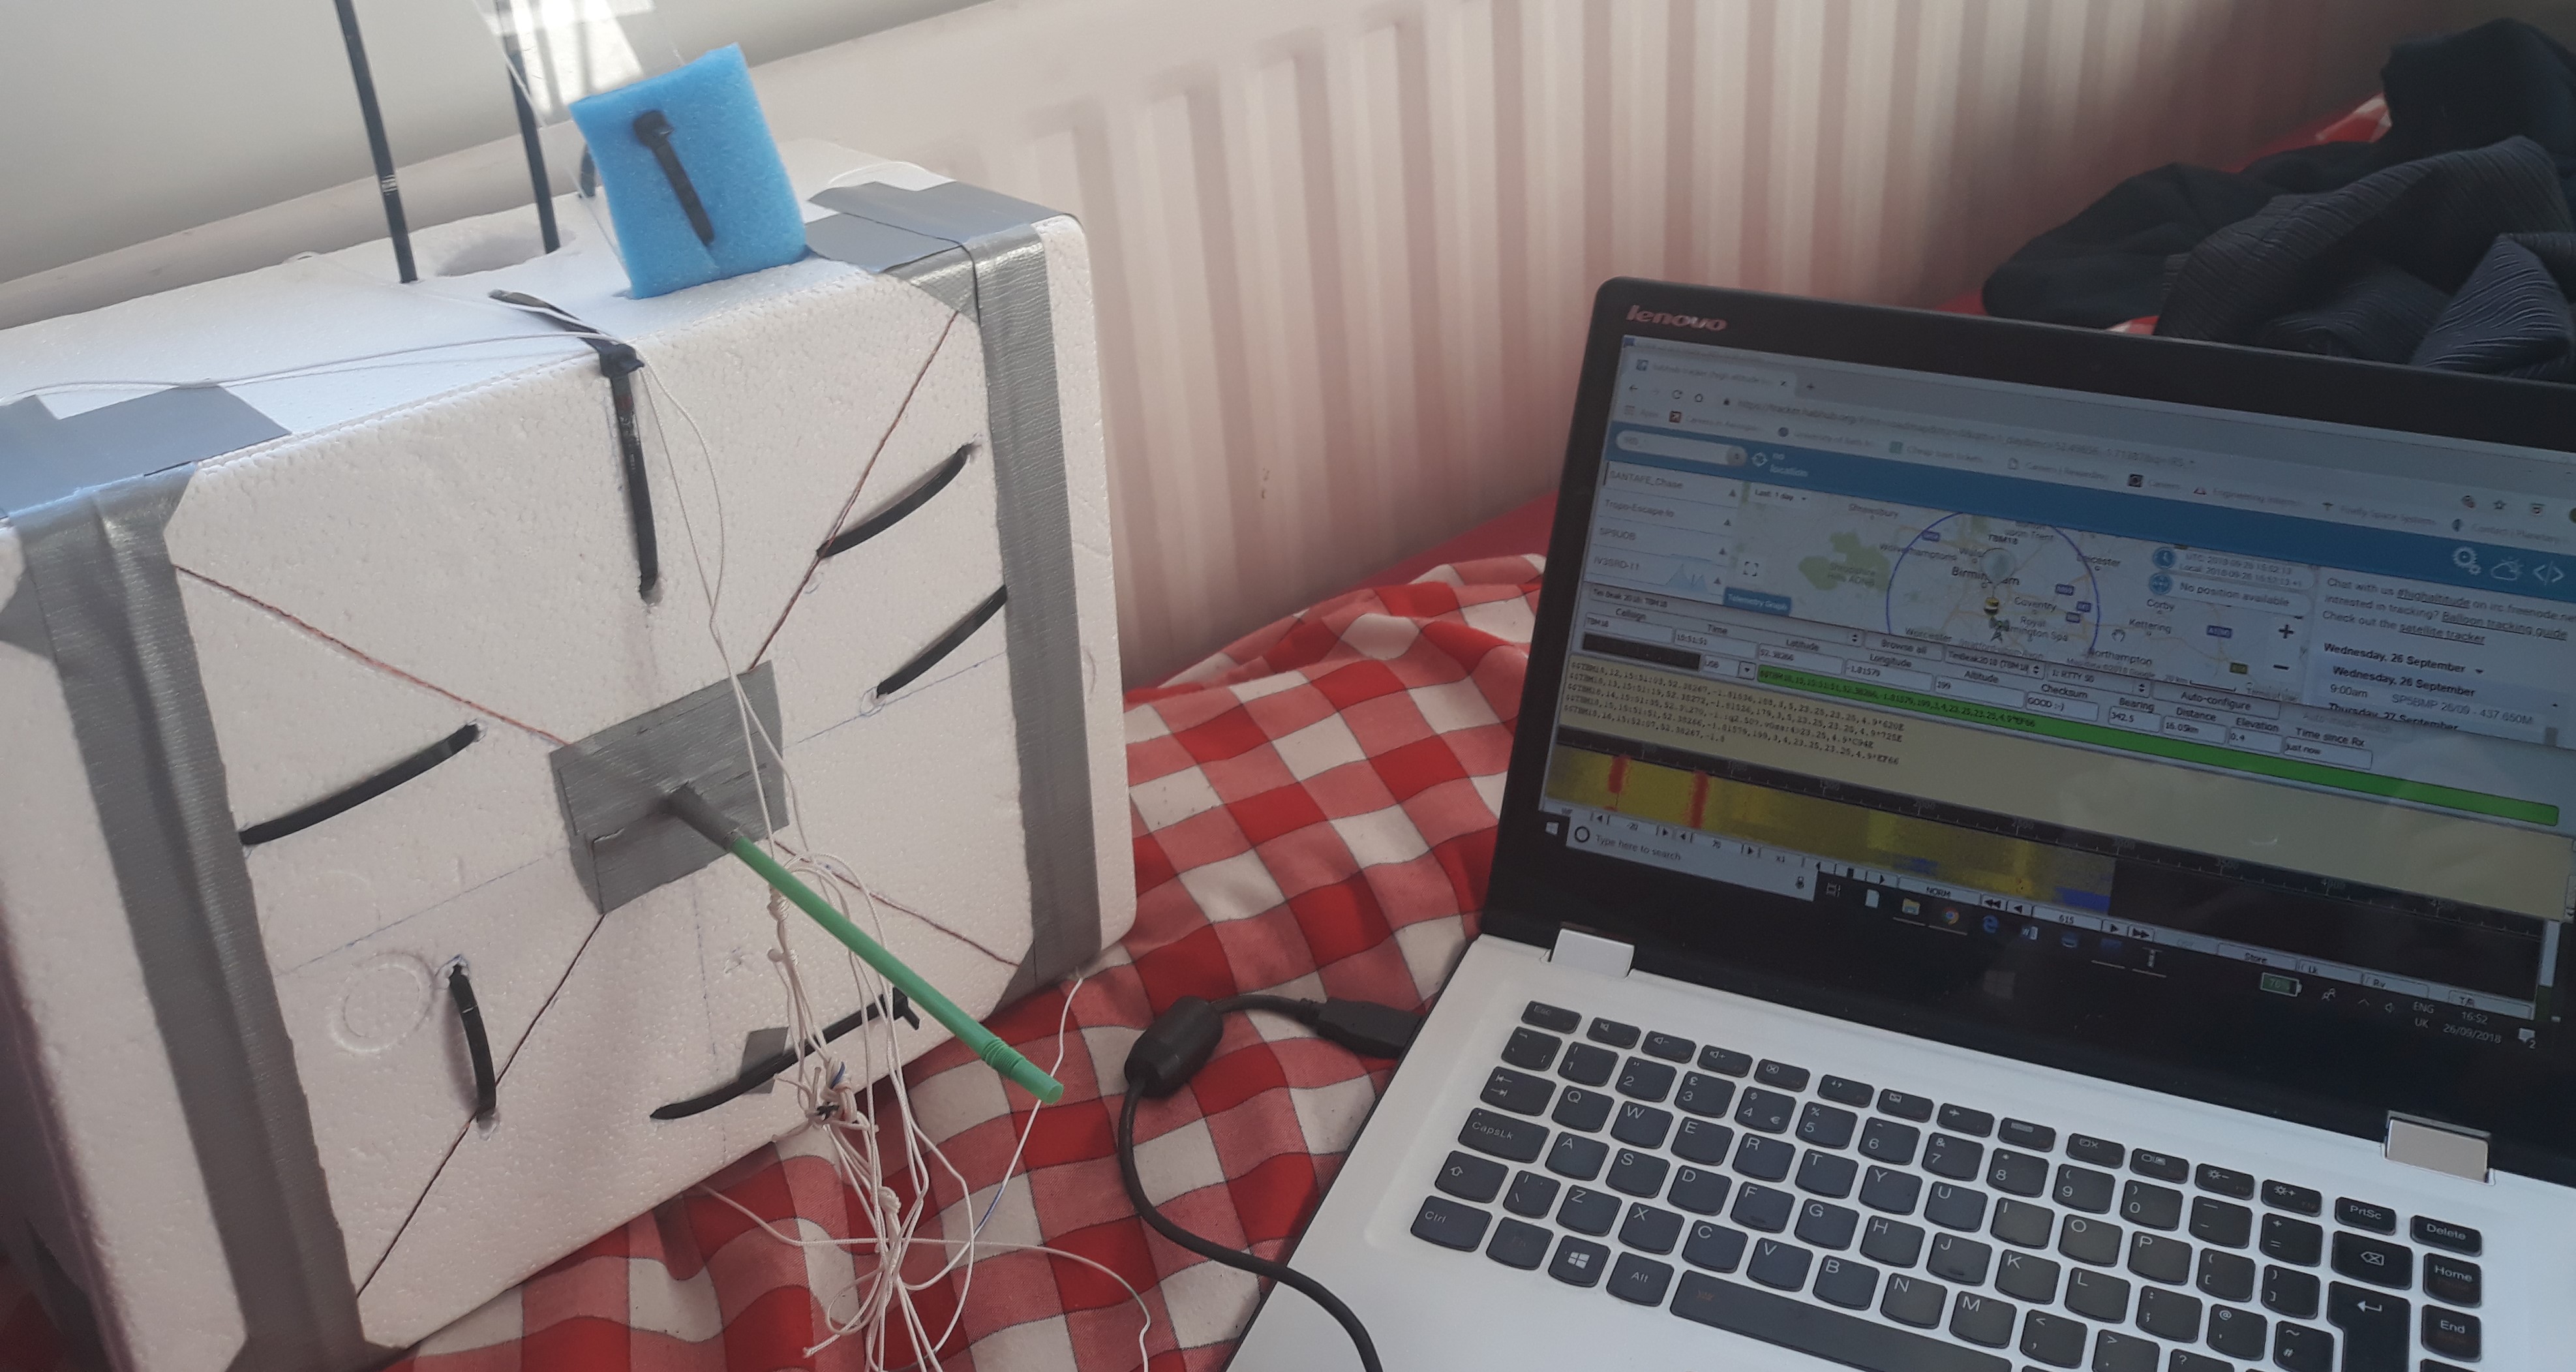
The payload antenna seen forming a cross on the underneath of the box, and the main radiating element covered by a straw to keep it straight.
Further improvements from lessons learnt
The eagle-eyed readers amongst you might notice that the polystyrene payload box in the picture above is not the same as you have seen in all my previous blog posts! During the first launch attempt I found it difficult to secure all the components in the box so I decided to start again with a bigger sized box, and this time use Velcro as well as cable ties. The interior of the new payload is shown below.
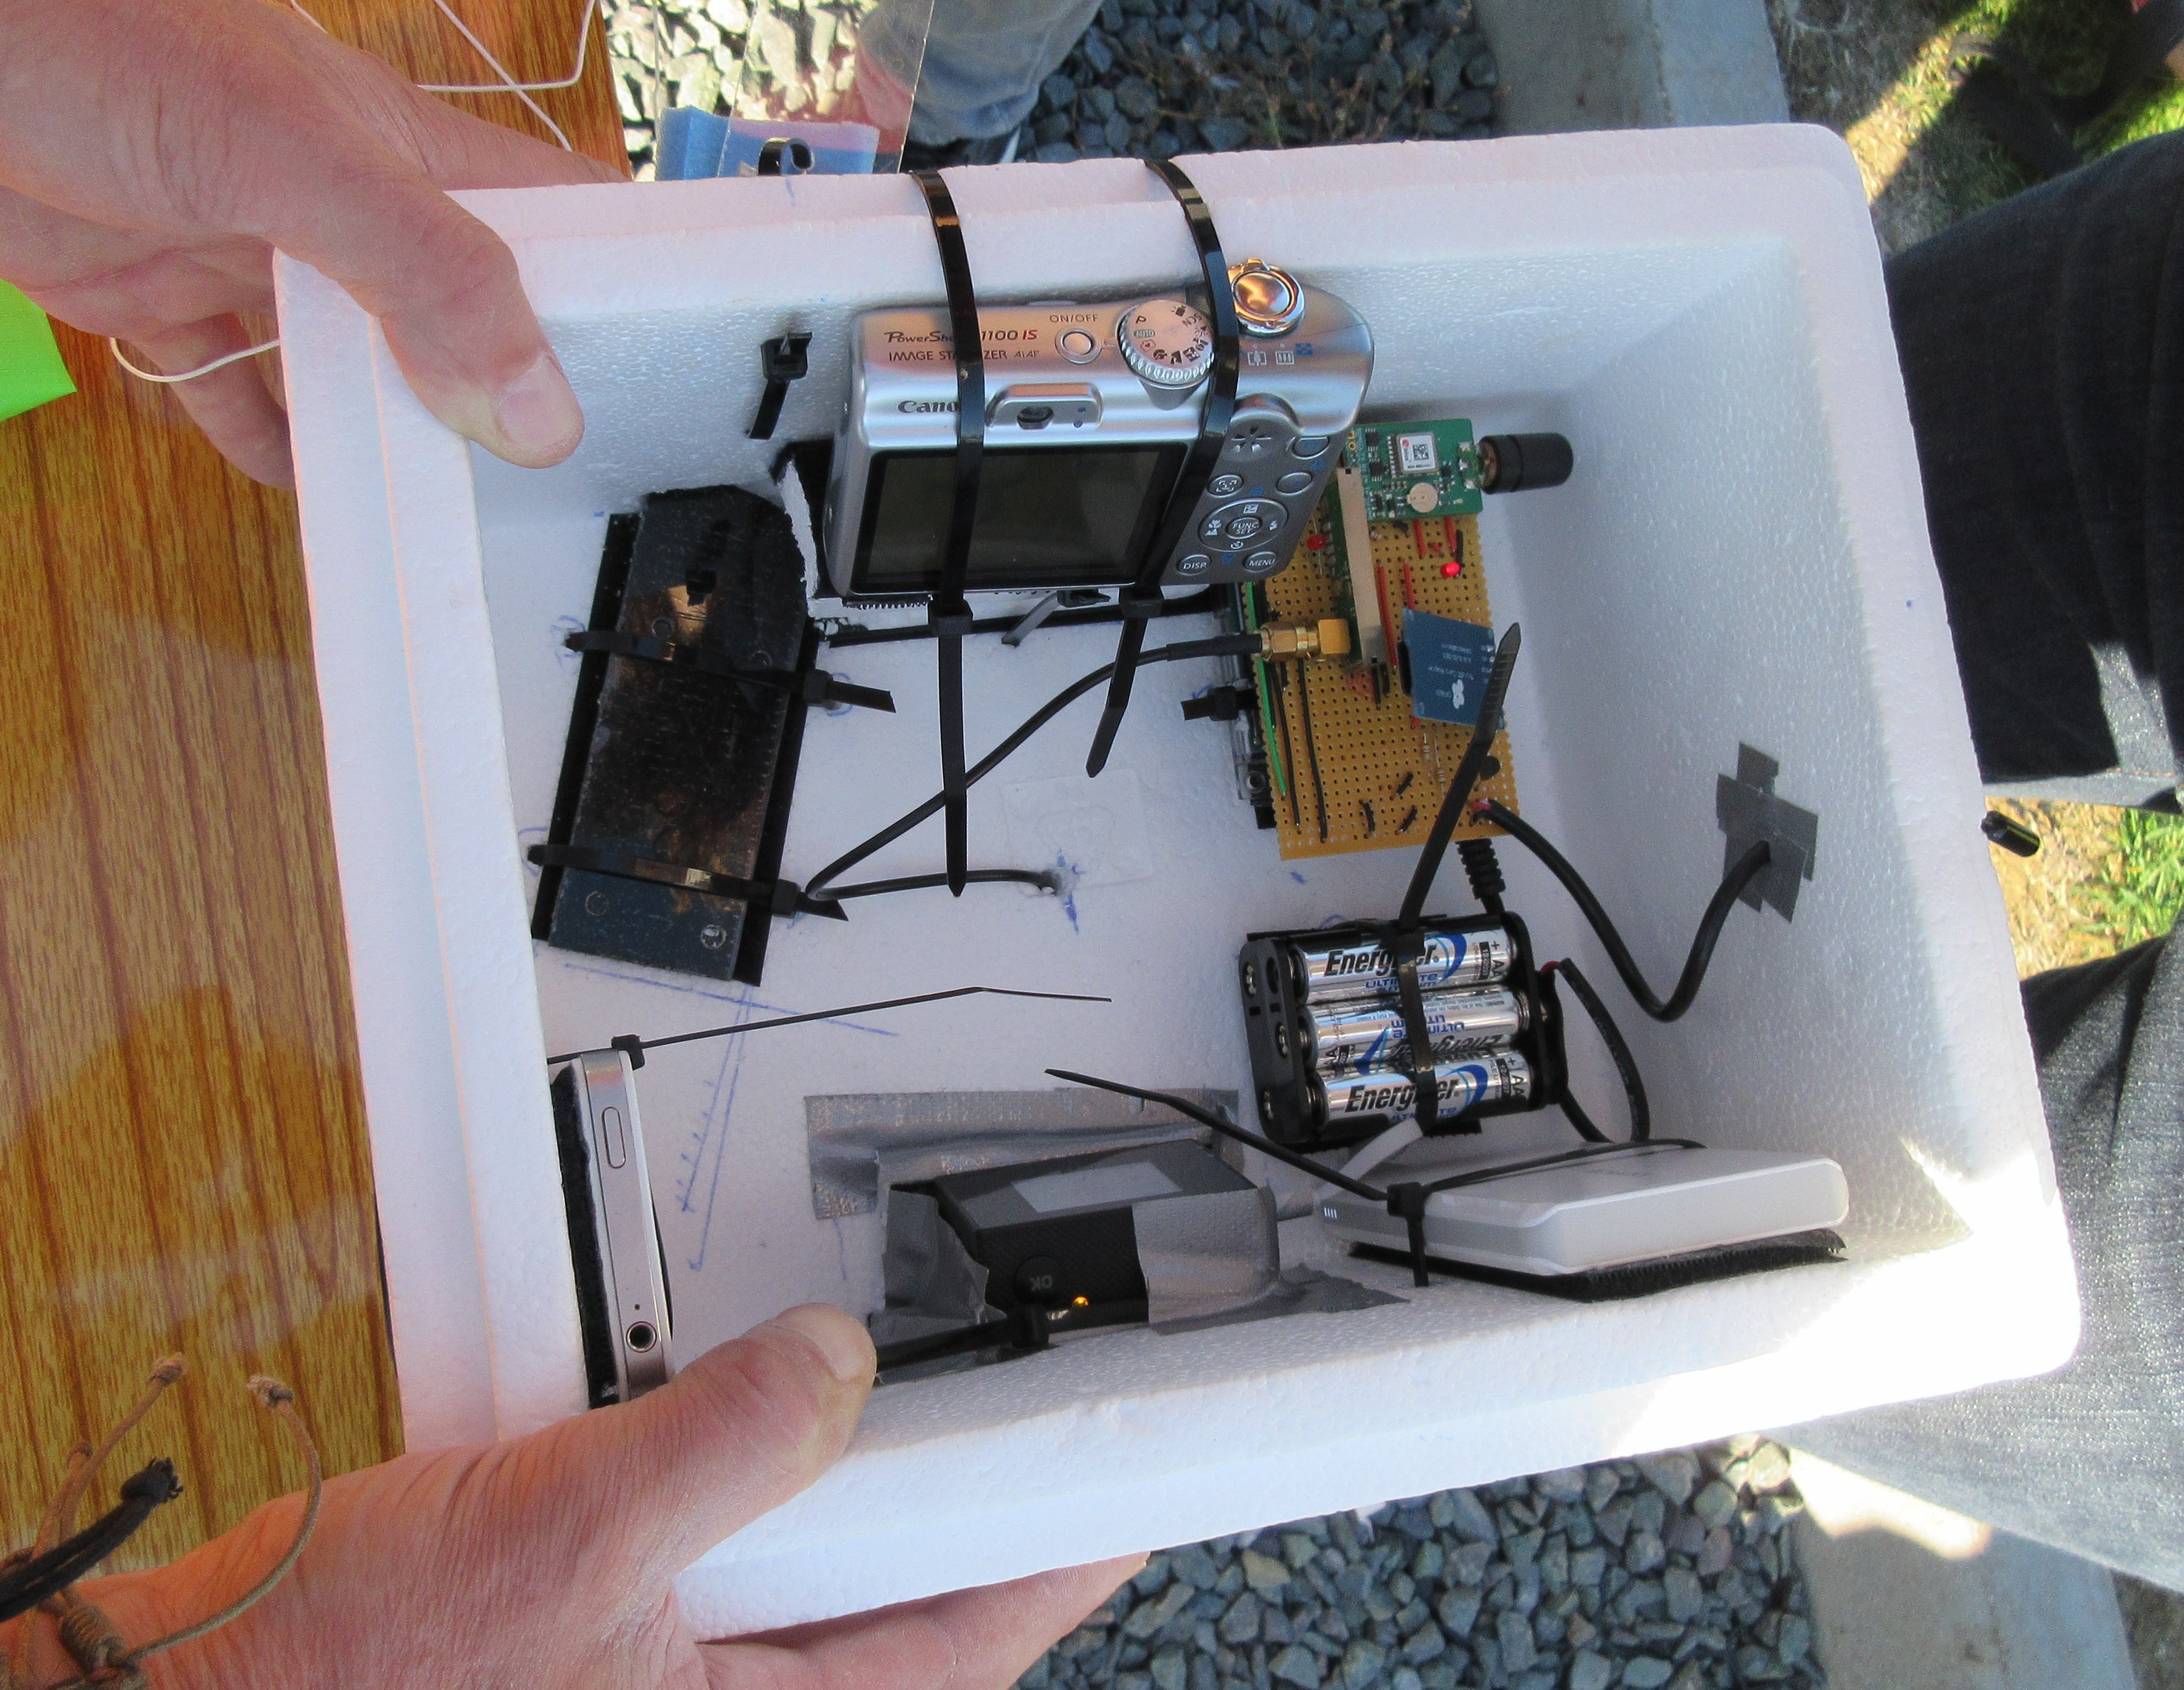
The payload interior. Starting at the top and going clockwise - Canon camera, tracker with external temperature sensor poking out the box, Arduino battery pack, power bank for video camera, video camera, iPhone as backup tracker, perspex to hold my mascot...
Something extra special
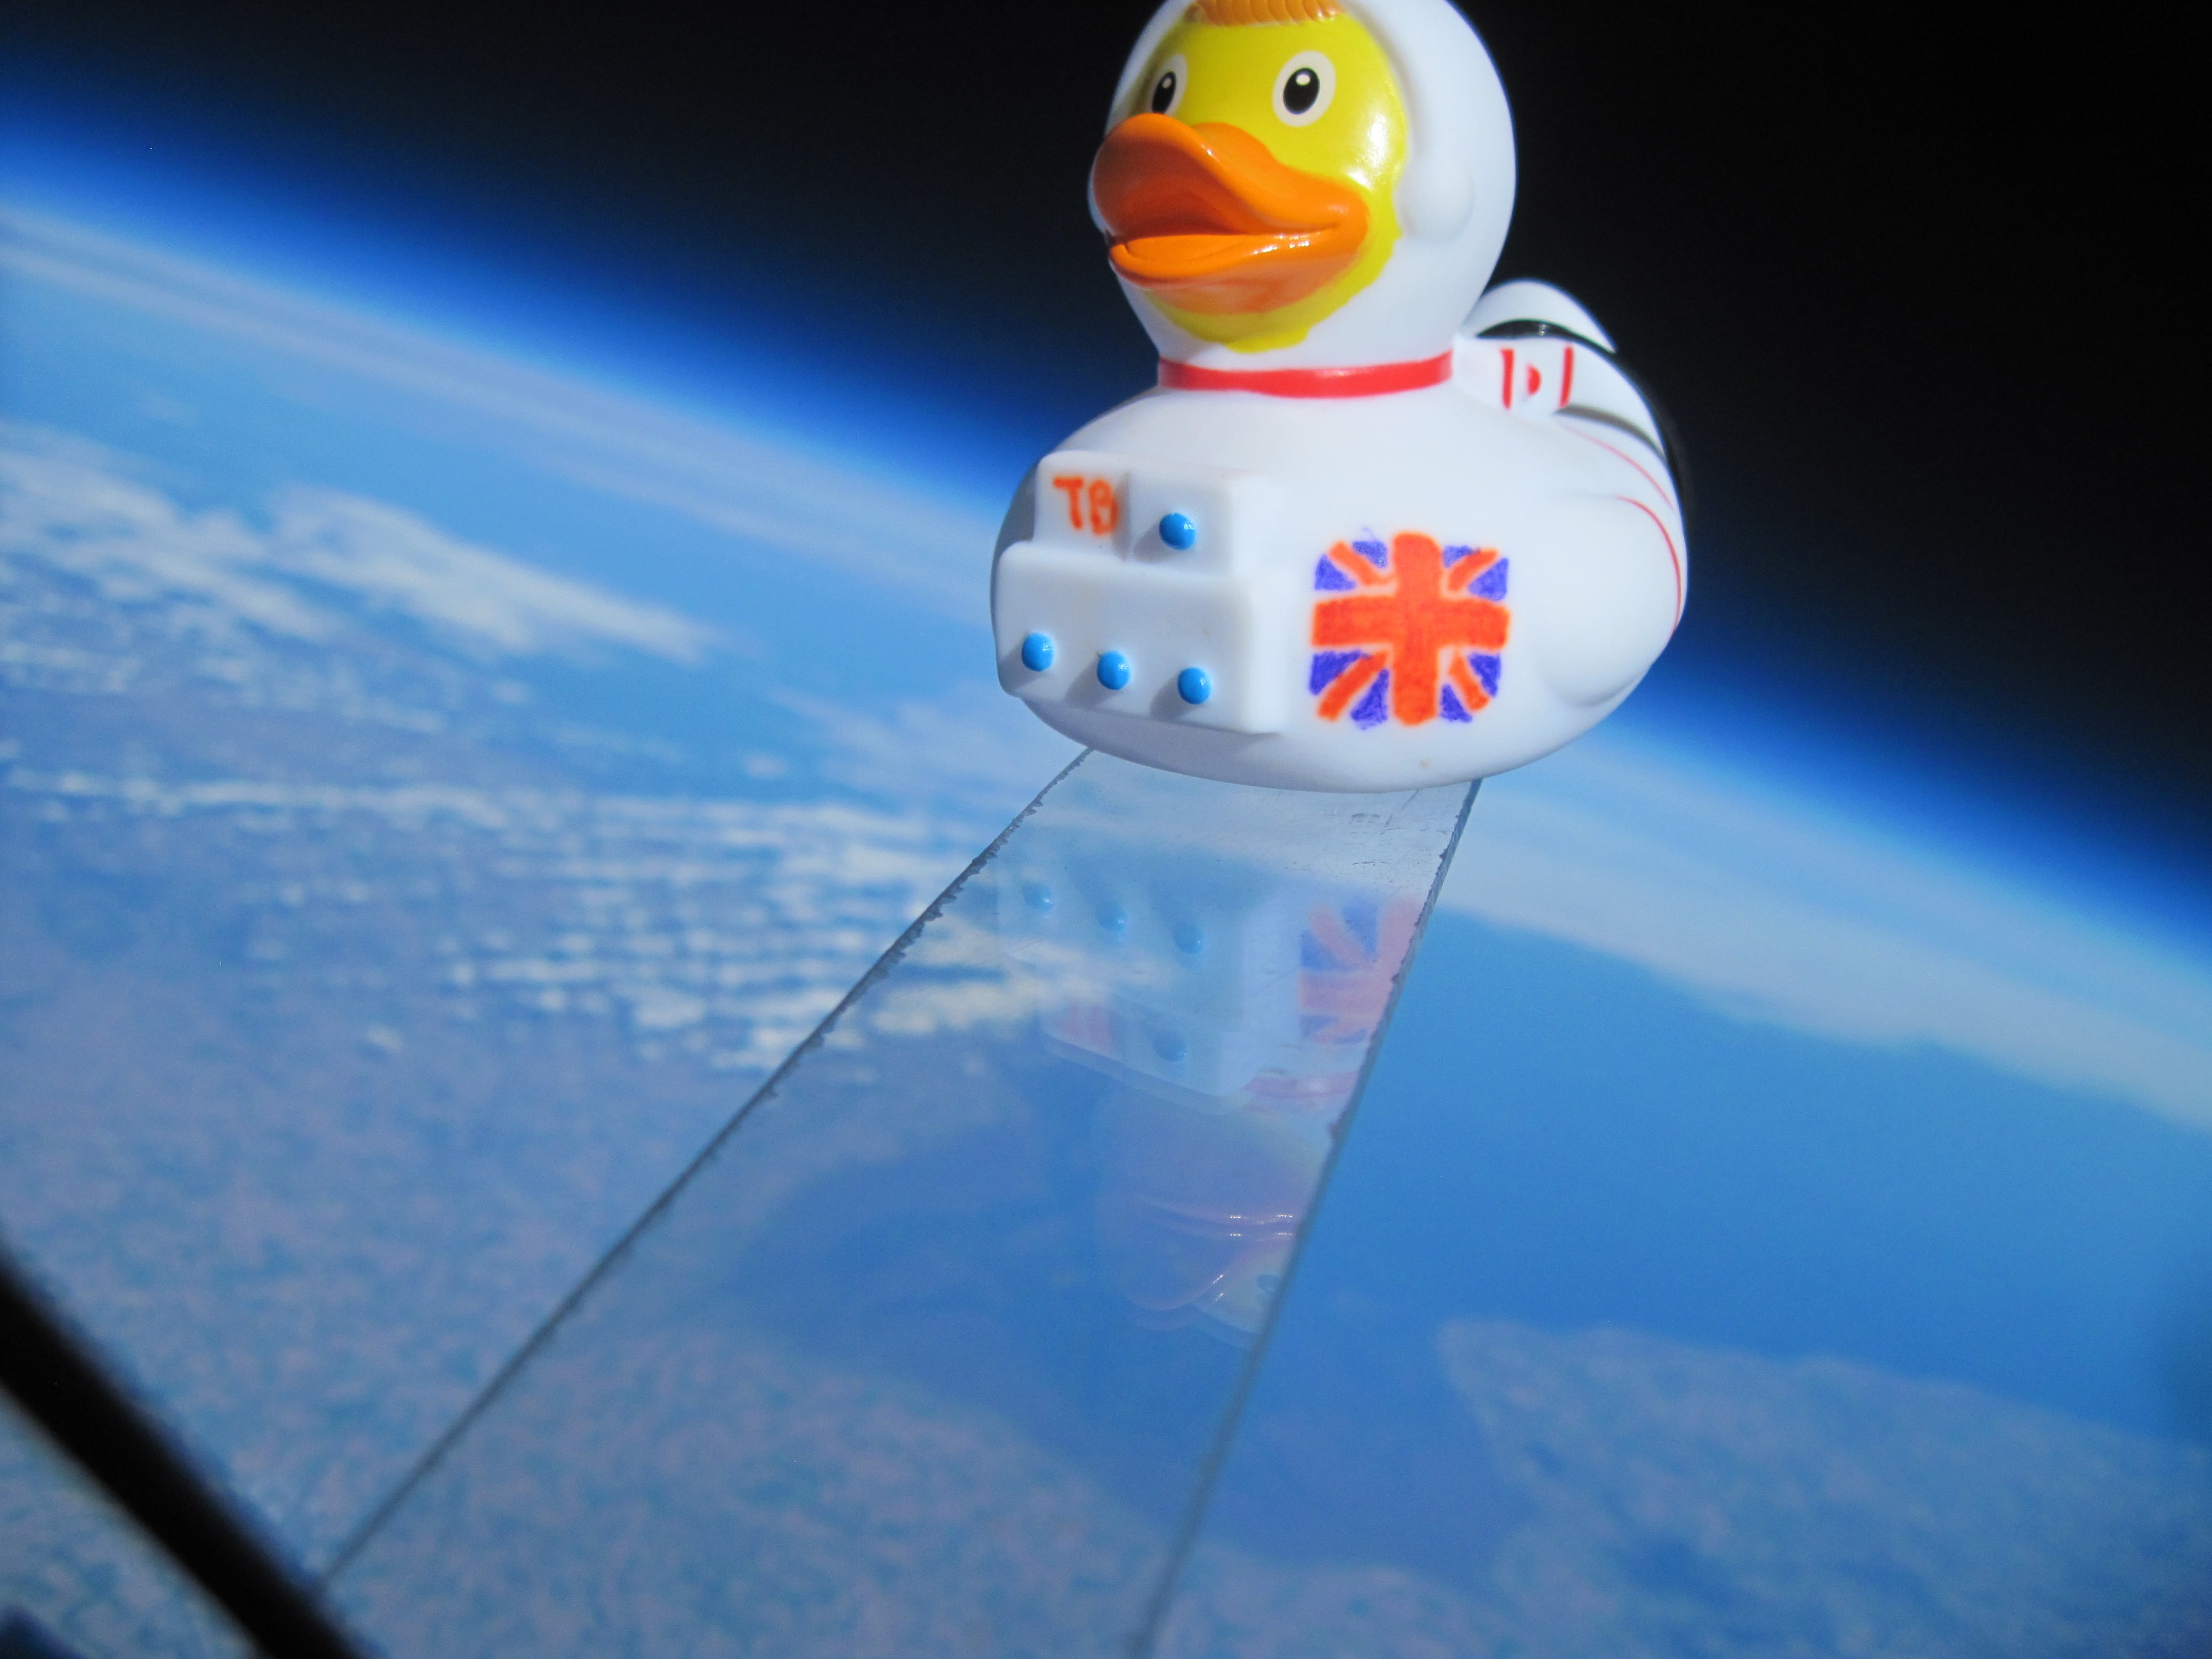
Launching a balloon to 30km and taking pictures of the Earth is something quite special, but I wanted to do something to make it even more out of the ordinary. It’s not uncommon to send a mascot with the payload to get pictures of said mascot with the Earth in the background, and this is exactly what I tried to do… Everyone at the University of Bath knows how popular our ducks are on campus, so I thought I would honour the ducks and send an astronaut rubber duck up as my mascot!
Meet Tim Beak!
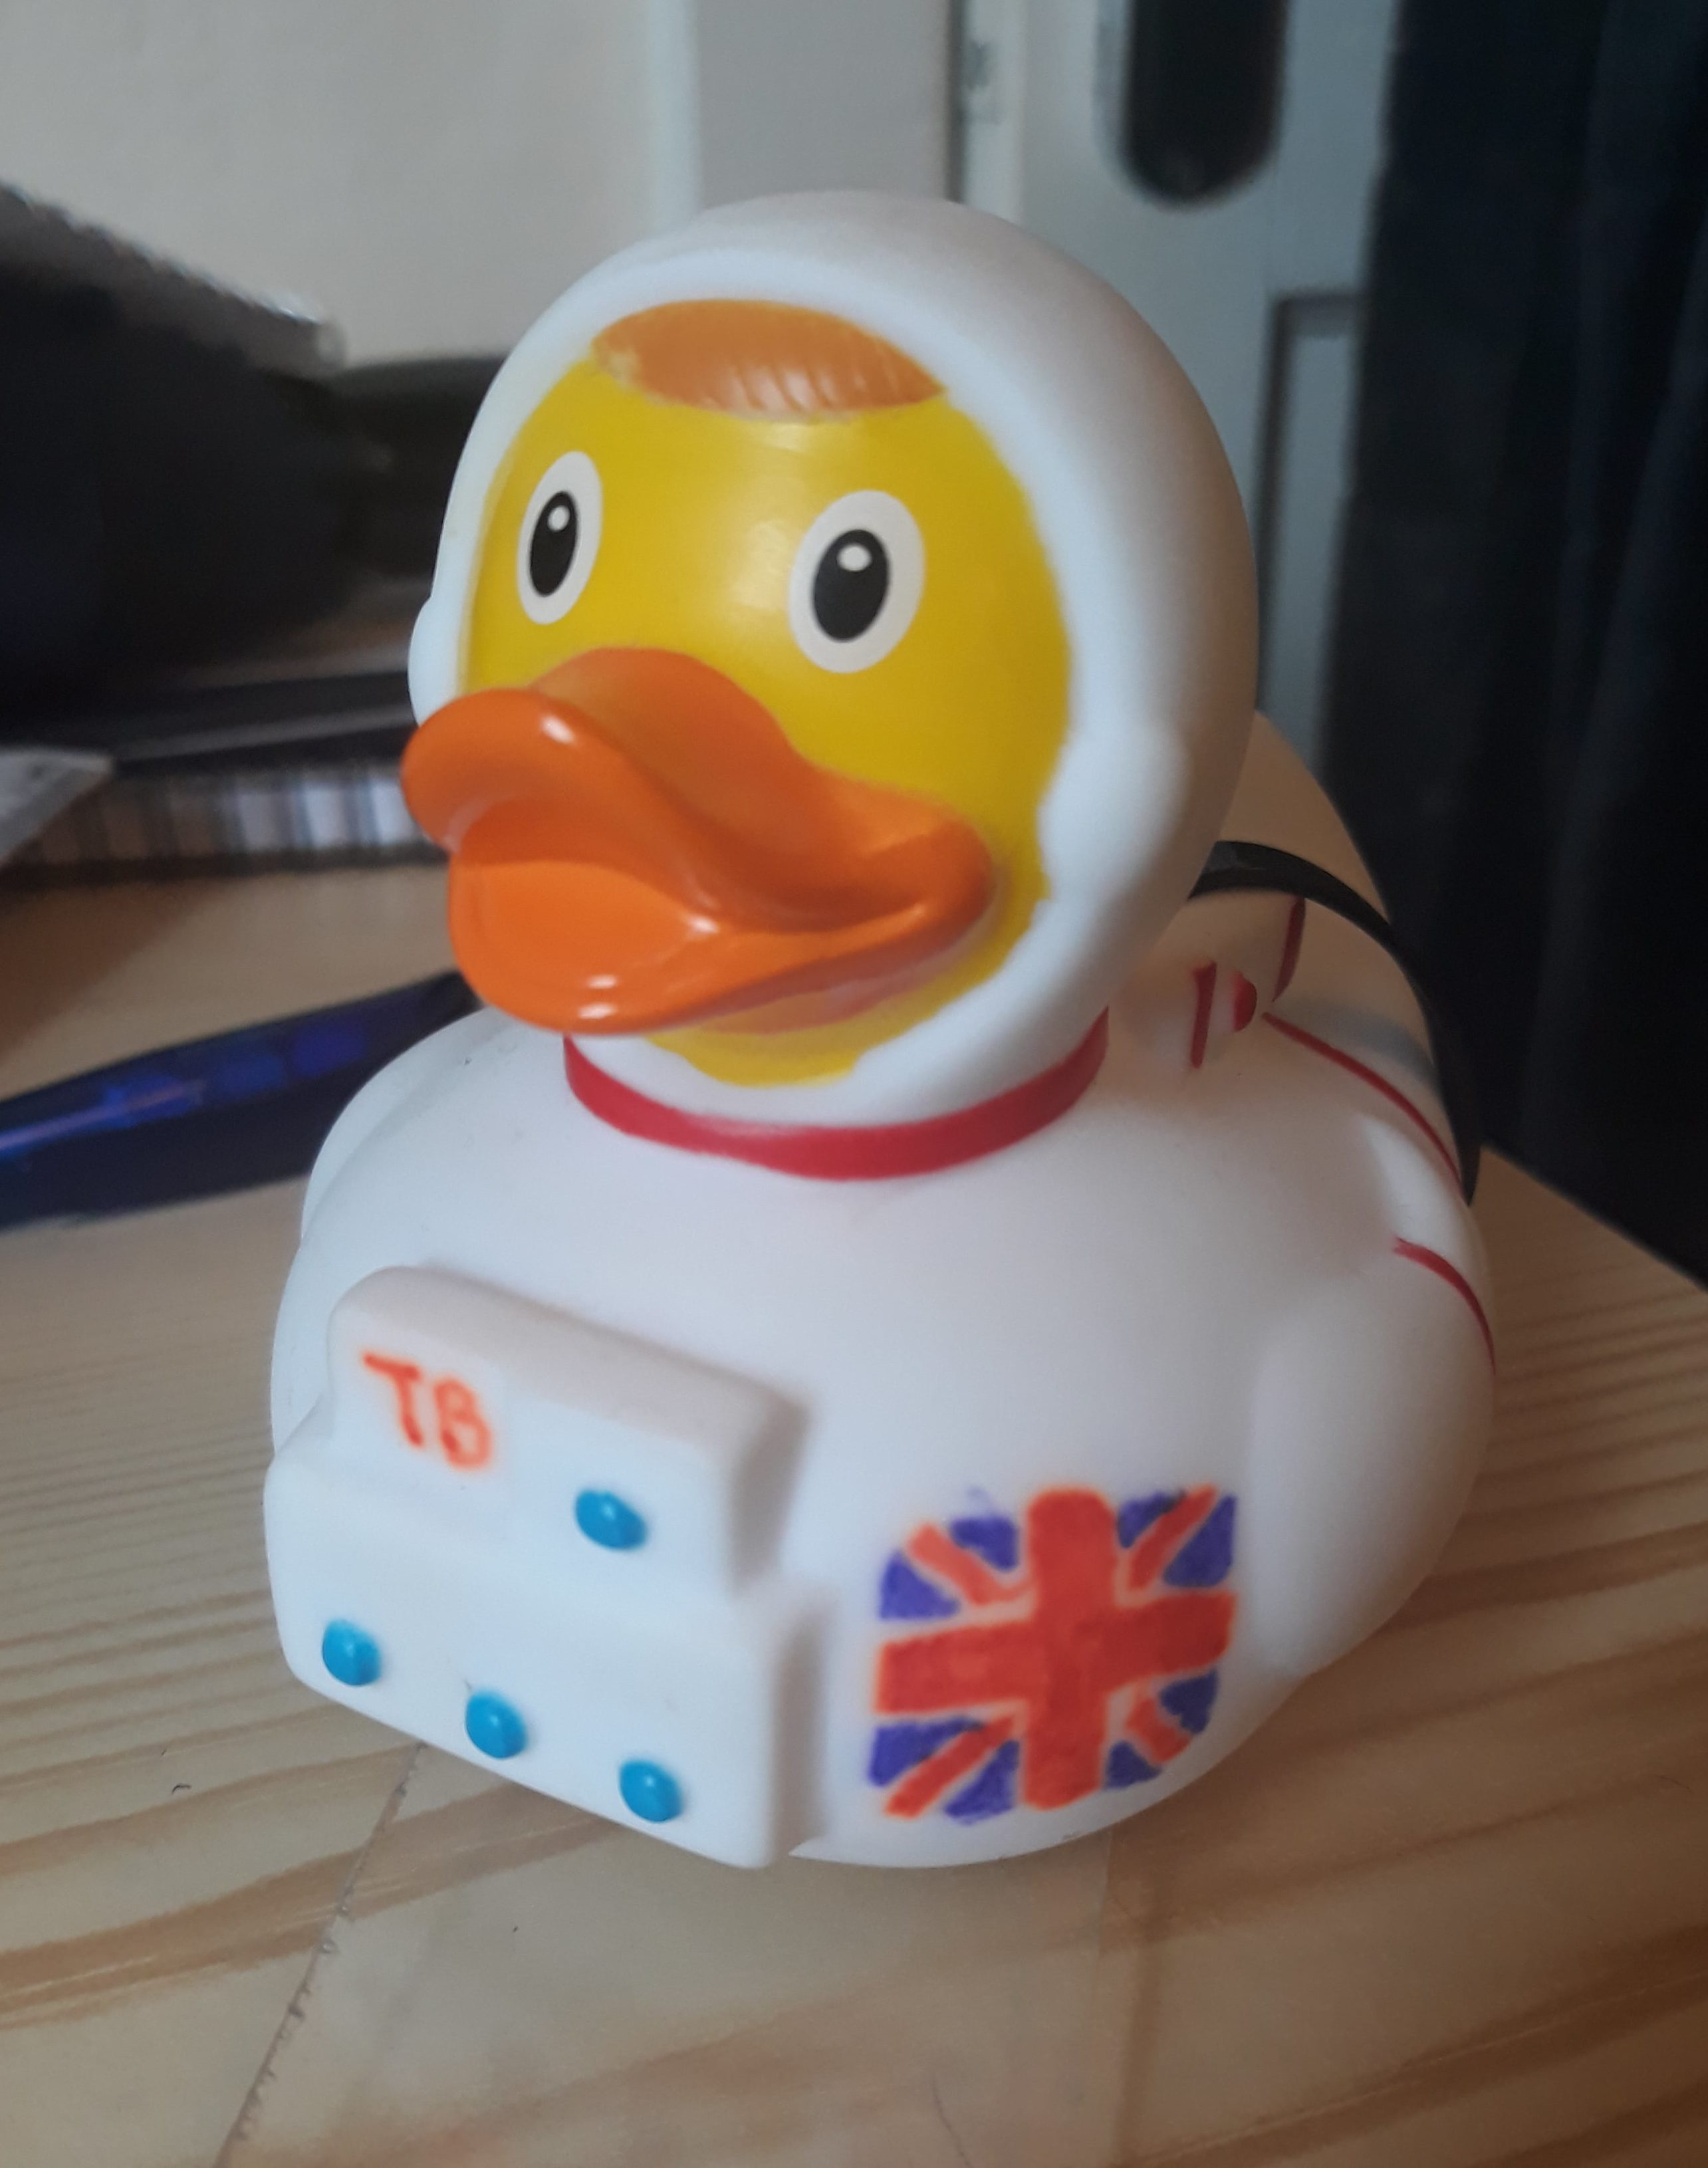
Tim will be sitting on piece of Perspex in front of the Canon camera – hopefully I can get some good pictures of him and he'll bring me good fortune!
Oh the British weather
It turns out the hardest part of the project was actually getting a good day to launch on. Four weeks after the first attempt I had new launch permissions, this time for two launch sites so that I had a choice depending on the wind direction. I was raring to go but in running the flight predictions I was again disappointed…the wind was the wrong direction for one launch site, and from the other site the payload was predicted to land in central London. Launch cancelled again!
Another four weeks later took us to mid-September, right at a time when Storm Ali and the remnants of Hurricane Florence where battering the UK. I had my permissions (this time for three launch locations!) but all week the payload was predicted to land in the North Sea or pass over restricted areas! But, just as I was running out of time before university started again, the winds eased, and I had my chance!
The big day (again!)
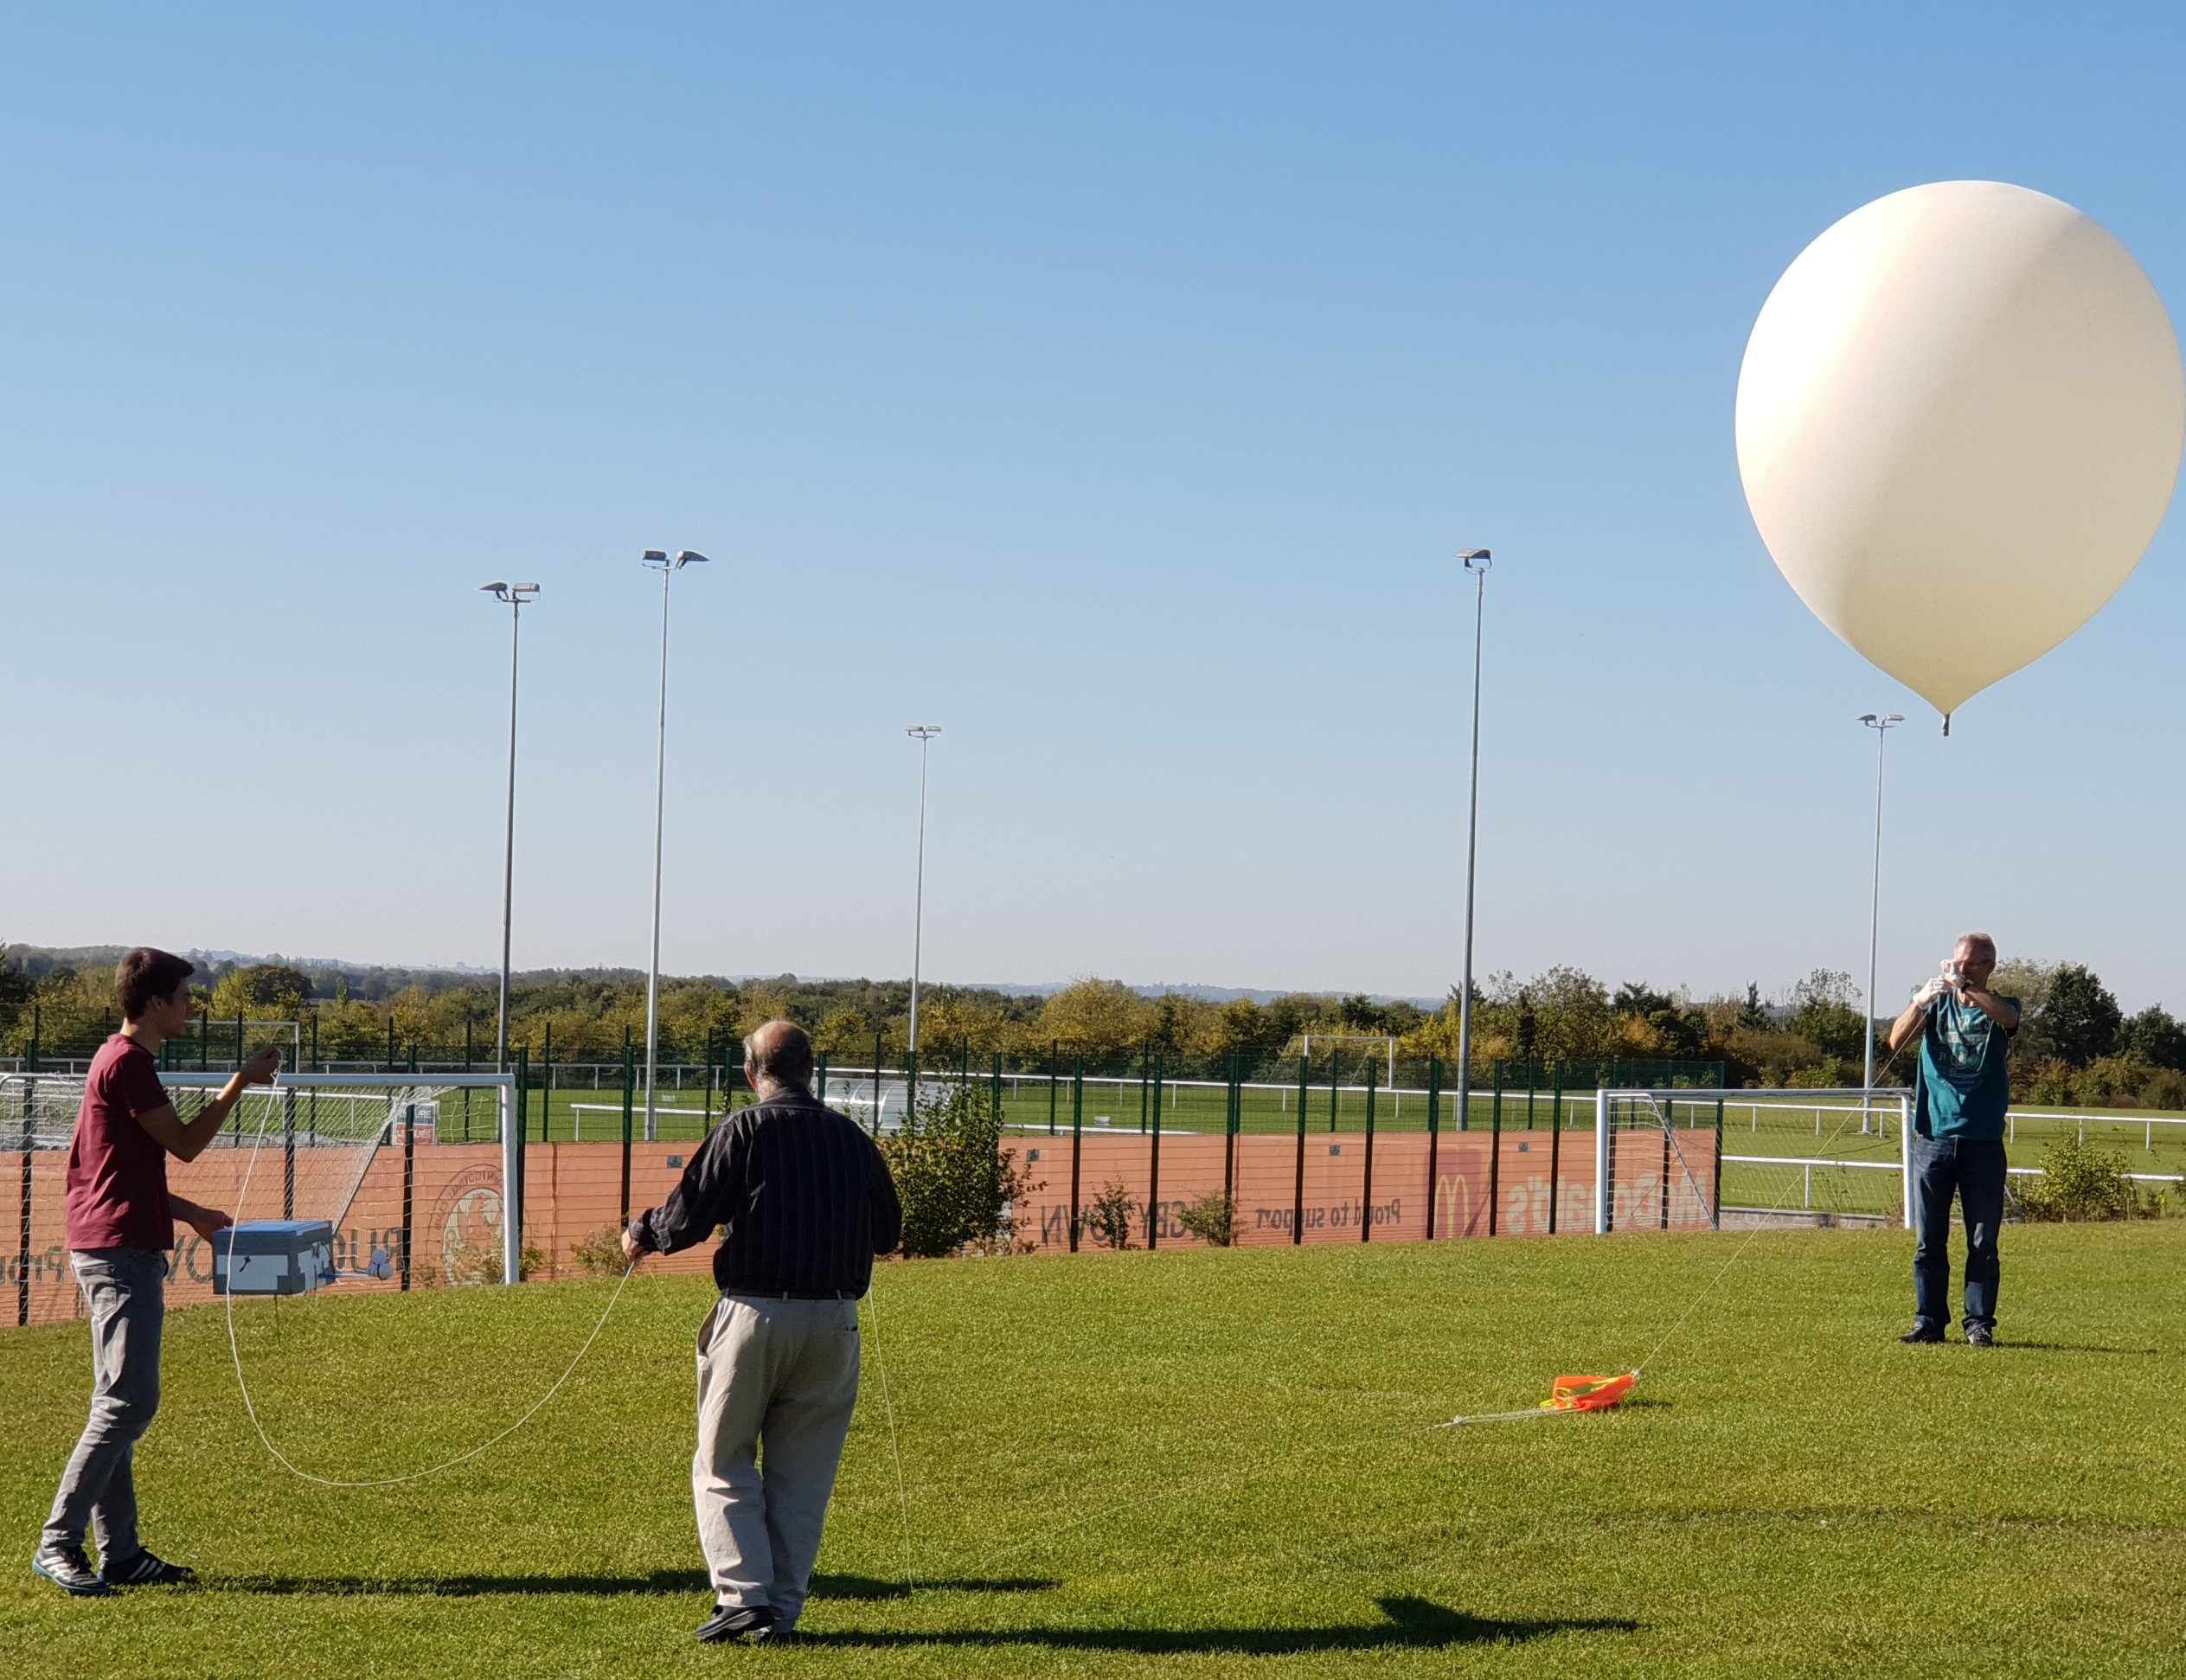
Travelling to the launch site I felt excited and completely prepared, but still a bit nervous. It was a family event and I was very grateful for help from my parents, grandparents, and uncle in preparing the payload and balloon for launch. We first turned on the tracker and made sure the signal was strong – it was! Then it was a case of starting the cameras, setting up the iPhone as a backup tracker, securing everything in the box with cable ties, and then taping up the box. Next it was time to fill the balloon, which proved quite difficult when the wind picked up. I won’t say too much about the process because it can all be seen in the video at the bottom of this page. I used a ‘fill tube’ – basically some PVC pipe with lots of sealant and tape – to pass the helium from the hose nozzle into the much larger diameter neck of the balloon. You may also notice a milk bottle with a certain amount of water in attached to the fill tube. I knew the balloon was filled with the correct volume of helium when the balloon could just lift the weight of this bottle off the ground, as this was equivalent to providing the force required to lift the weight of the payload and lift it up in the air at 5m/s.
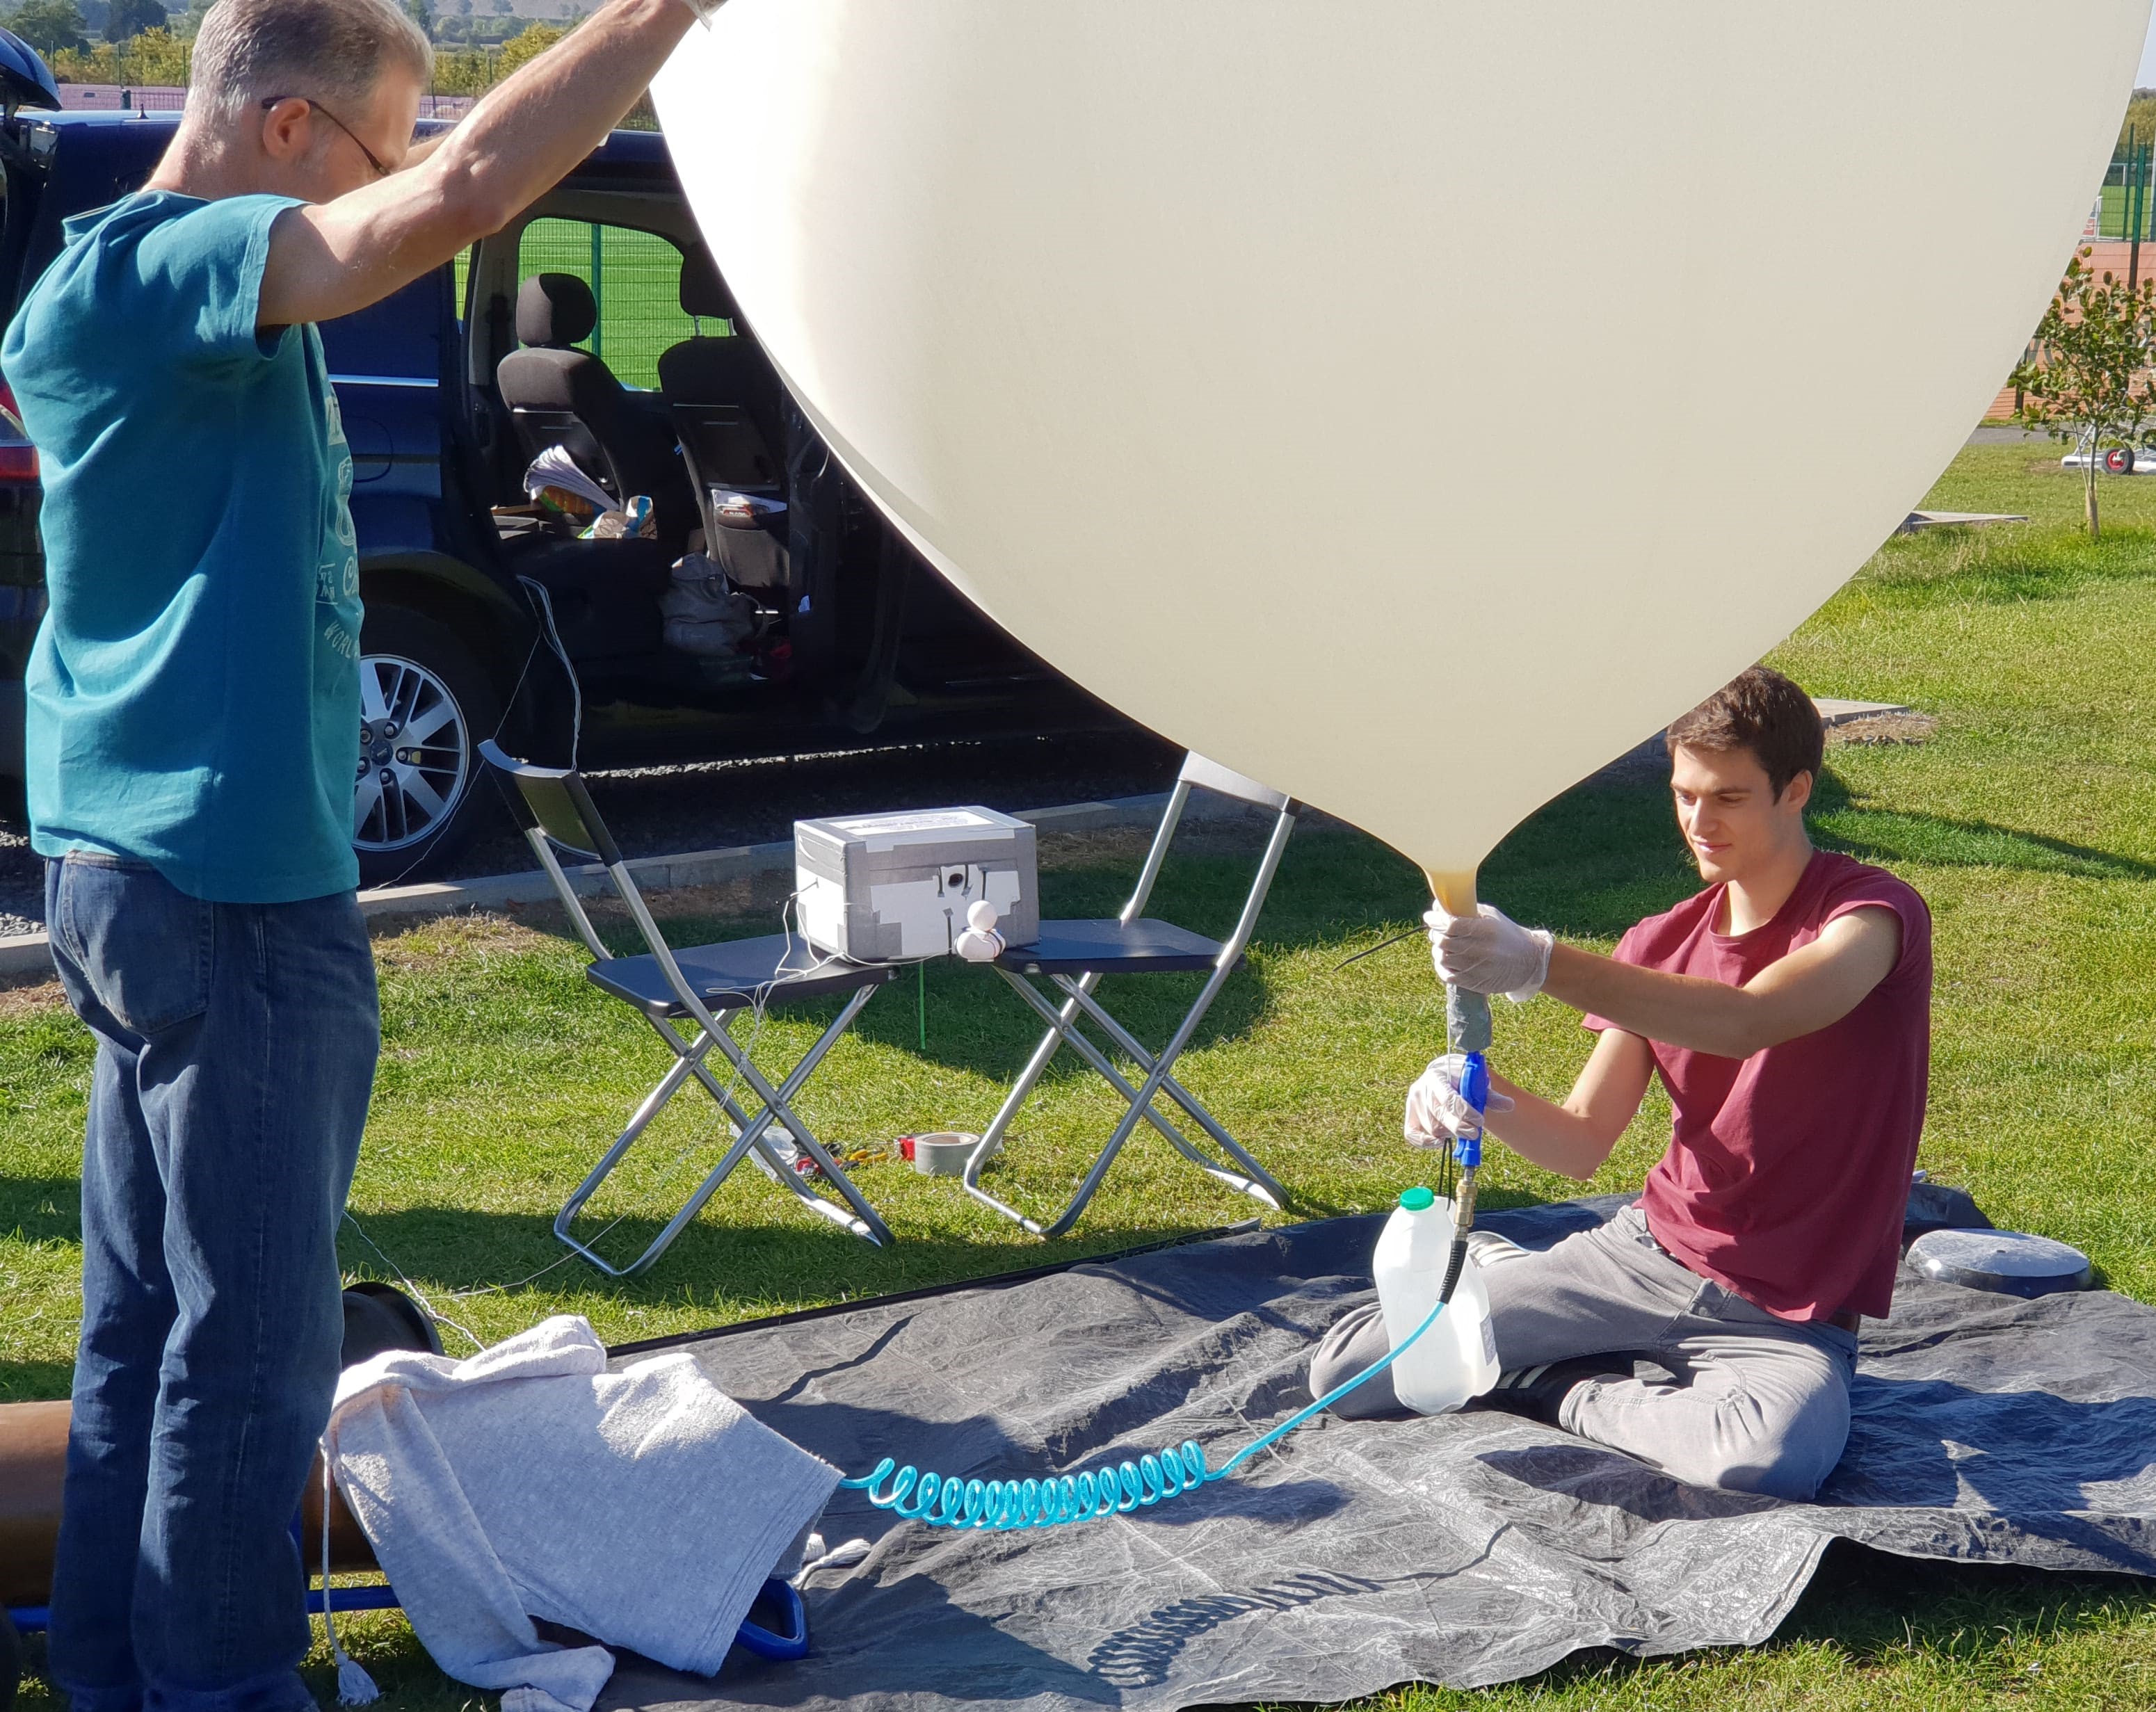
Filling the balloon - nearly enough helium to provide the required lift
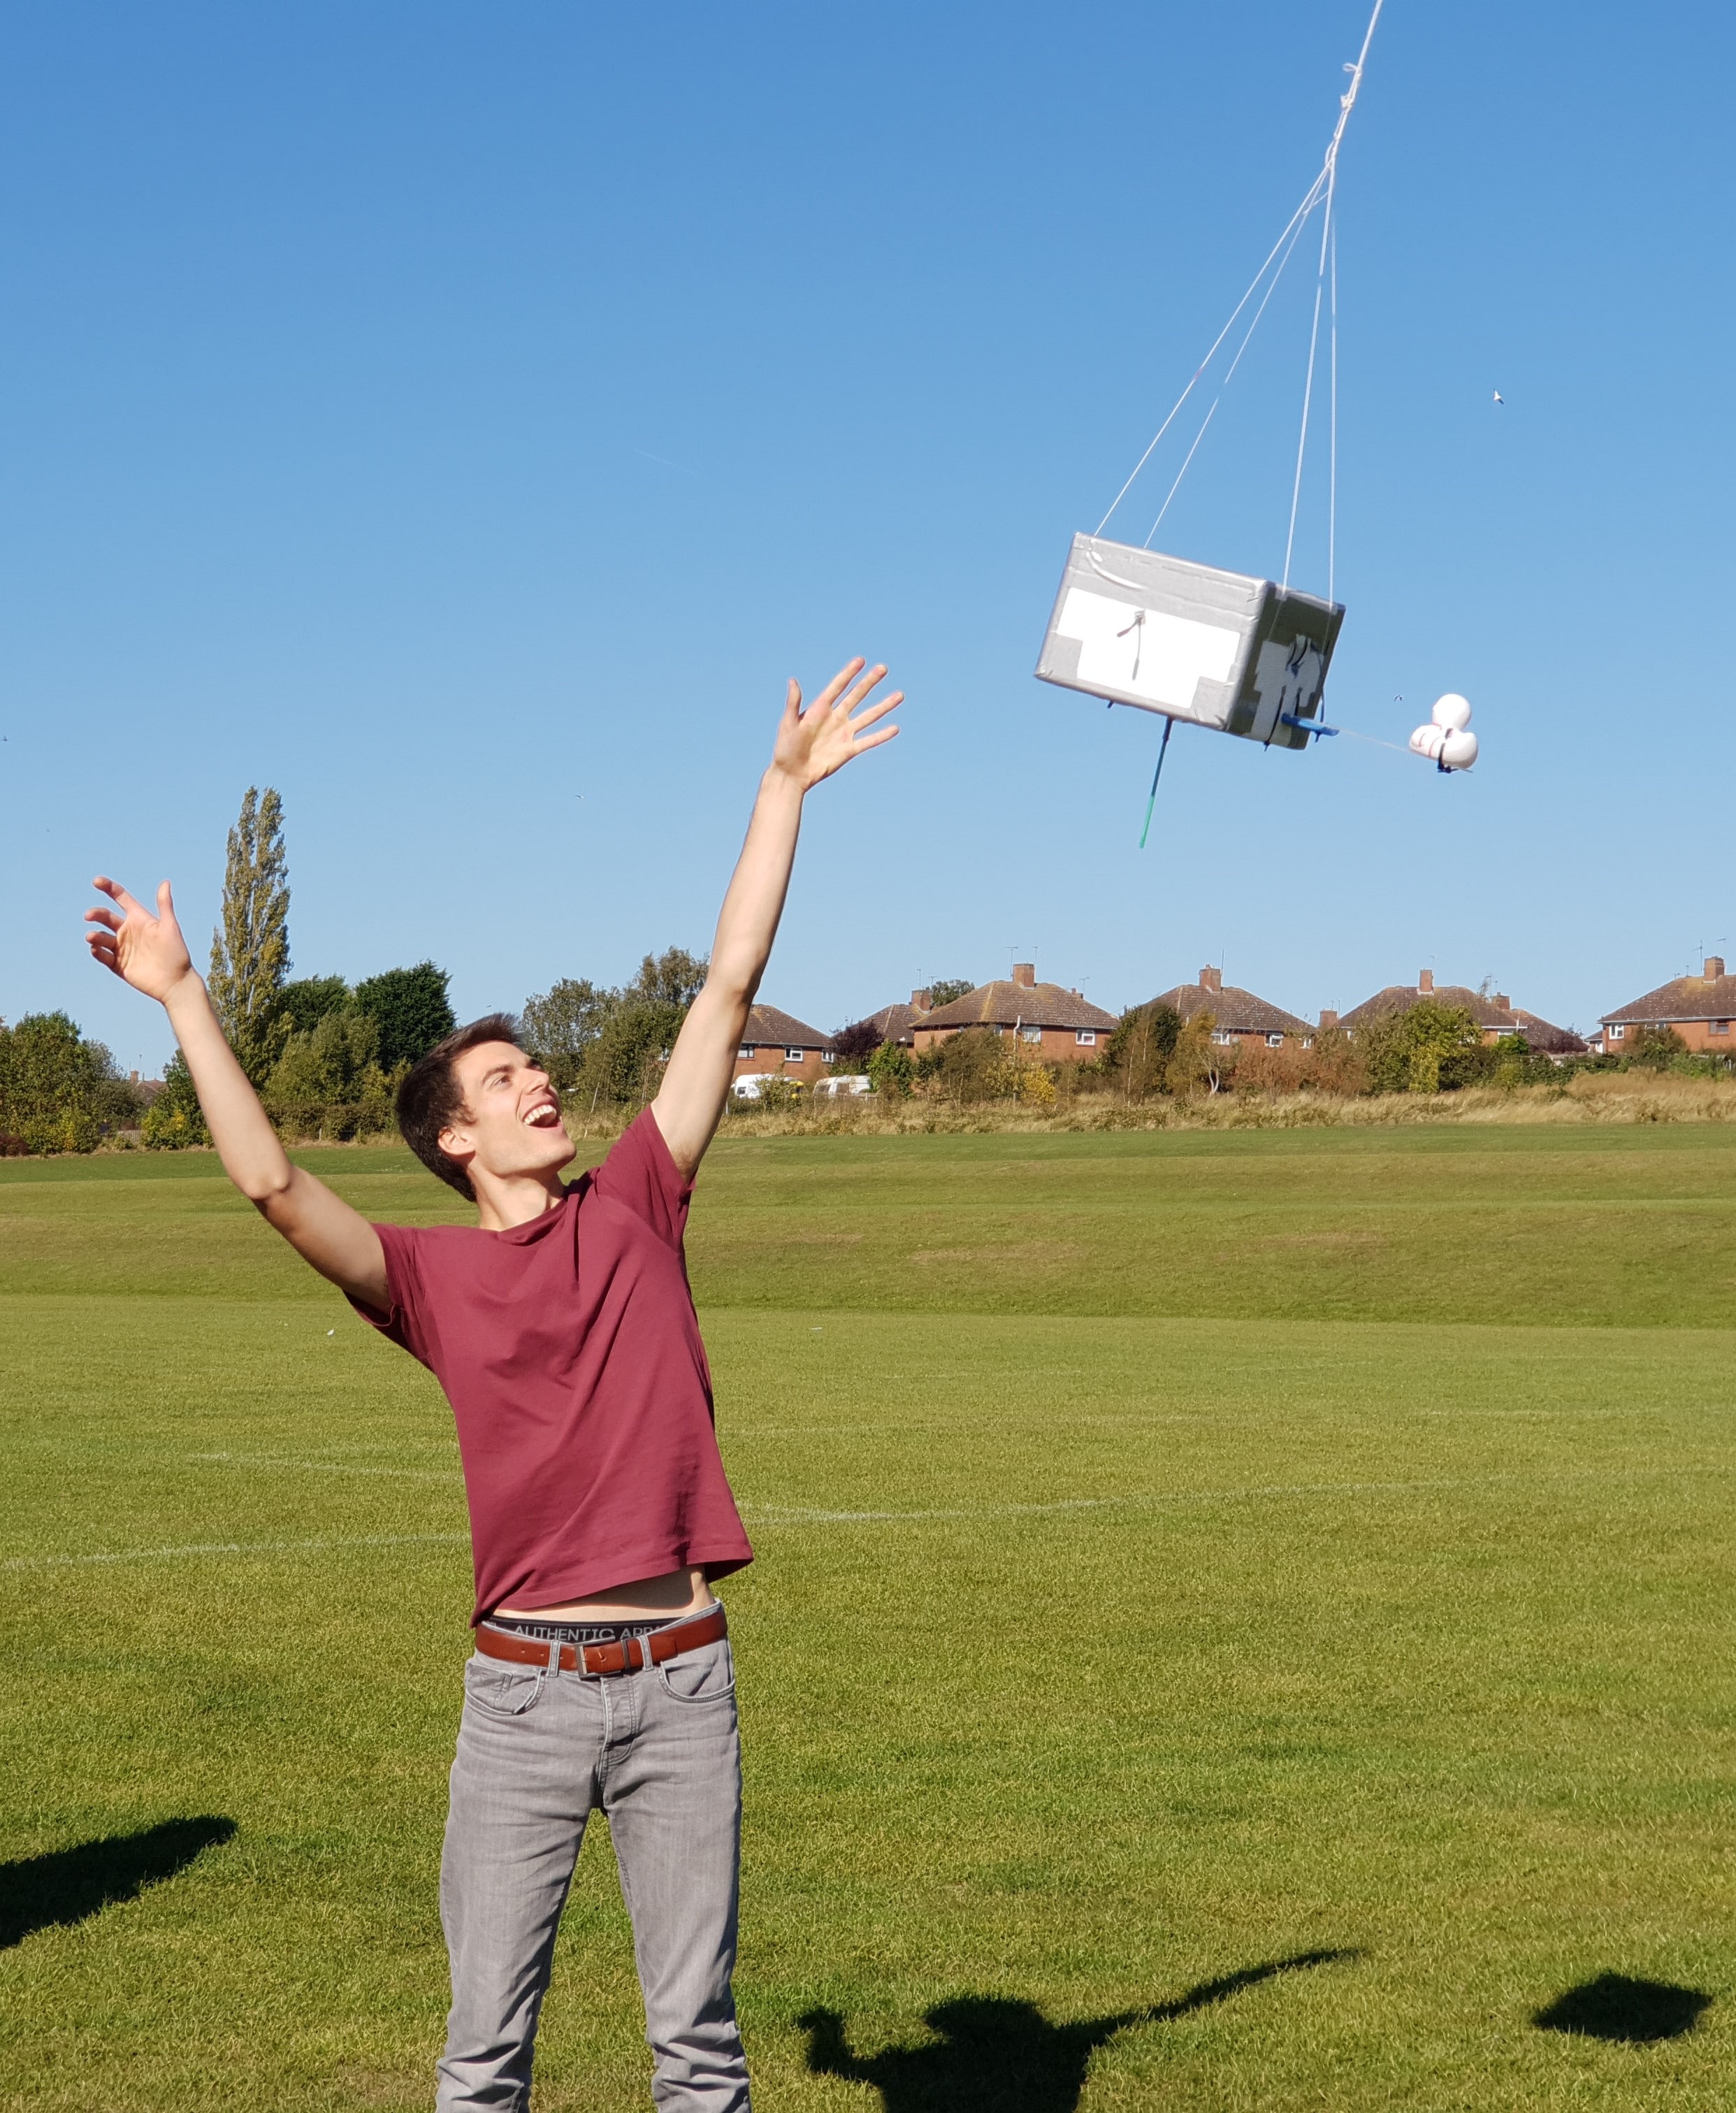
With all systems go we tied off the balloon and secured it to the parachute. Sounds simple but believe me it was much trickier than I had anticipated - in the end requiring three pairs of hands to hold and secure everything! So, after weeks of waiting and months of work, I found myself on a rugby field holding the payload in my hands, with a huge balloon 15m above my head. It was finally happening! A final wish of good luck to Tim Beak, a prayer that everything in the payload was still working…and release!
There was nothing I could do to it now. The balloon would rise and rise, the wind would blow it miles away, and although I had an idea of the area (provided my calculations were right), I had no idea where exactly the payload would land. What I could do though was track it! We quickly packed up and got in the car, and I was so pleased to get a good signal from the payload. I had notified the High Altitude Balloon community of my flight and I was amazed that I had up to nine people at once receiving my telemetry and helping to track the flight, some from as far away as the Netherlands and France showing just how good a radio tracker like I had made is!
We tracked the payload throughout the whole flight and as it came down we were waiting in the countryside near where we expected it to land. 2 hours and 25 minutes after launch we could see on the map that it had stopped moving, nearly 60 miles from the launch site. It had landed, and was only a 4-minute walk away! It was very exciting, and I was so happy that the tracking had been successful. The only remaining question was – what had it landed in? Well, not a lake, not a tall tree, not on a house, but in a field at the end of a public footpath! How lucky! I was thrilled to find that everything was still working, and Tim had survived – even though the Perspex had snapped on impact! Tim reached an altitude of 29.2km and a temperature of -53°, an inspiration to all ducks! I was even happier when I watched back the flight footage and pictures, which I have combined to produce a video about the launch, flight, and recovery. The flight could not have gone much better!
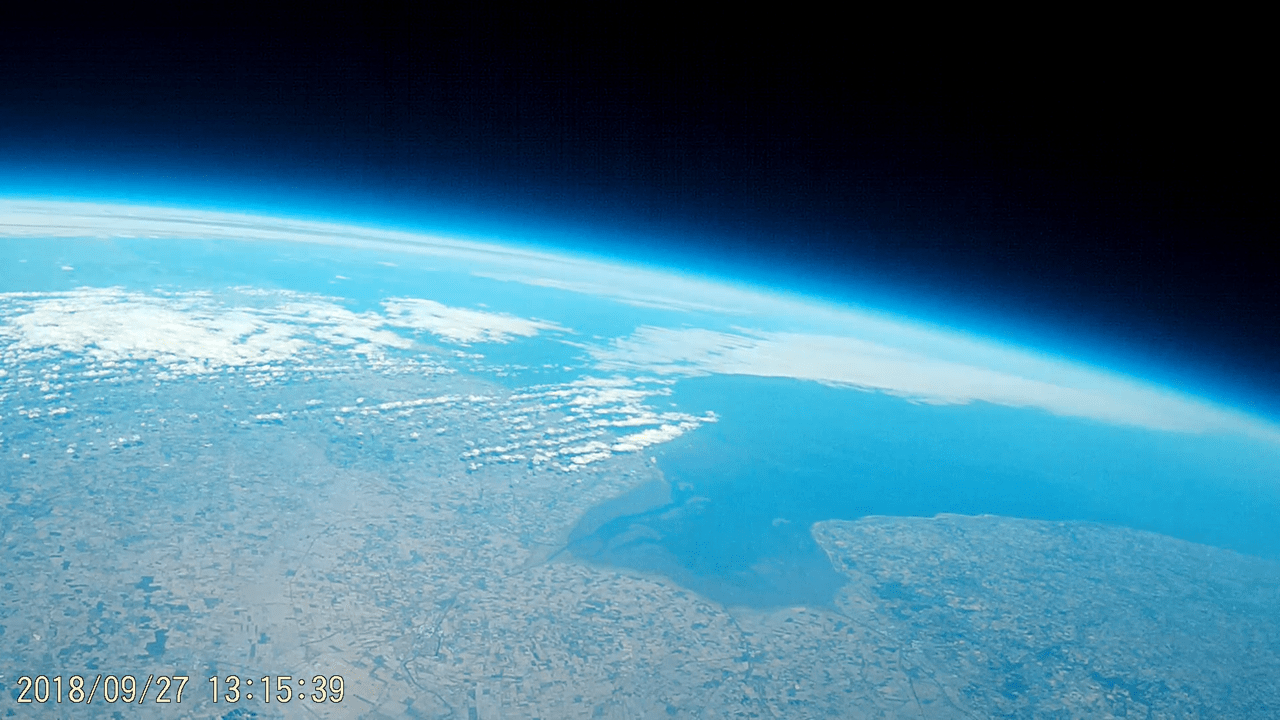
Top: screenshot from video camera. Bottom: picture from Canon camera. Both overlooking the wash near the burst point at 29km above Huntingdon, Cambridgeshire.
Concluding comments
I really enjoyed doing this project and solving the many problems I encountered along the way. I have learnt new skills, particularly in practical electronics which I had little experience with before, and has taught me that things will work out alright in the end as long as you don't give up. I hope you have found these blog posts interesting, and may have been inspired to do something similar yourself! I'd like to thank the Department of Mechanical Engineering for their support, the people of the UK High Altitude Society for their advice and fantastic online guides, and my family for their help throughout the project and on the launch day.
WELL DONE!!!!
What a day...and what an amazing finish to such a brilliant project!
Tim Beak and Jacob...you did us all proud 😁
Thank you 🙂 I'm so glad it all worked as planned!
Great project Jacob, and what an awesome result! Absolutely fantastic - well done! Tim Beak lives to fly again perhaps?
Thank you very much! I am so pleased with the pictures and videos. Yes, maybe one day ... I can see how people get hooked on launching these things!
Wow this is fantastic! Just watched this with my 6 year old daughter and she was really inspired. Such a cool project!
Amazing little project and great pictures - totally fab! well done.
Great story, well done! Can you give some details about the iPhone? Was it still working? Did you need to insulate it or heat it? Did you use ‘find my iPhone’ to help you locate the payload? I’m looking for a backup tracker (having lost the payload on my first attempt 😟) and am really curious about how effective the iPhone was. Many thanks!
Thanks! The iPhone worked! It lasted the whole flight without insulation or heaters and gave an accurate location on the ground using Find My iPhone (it only works at low altitudes). I believe it was an iPhone 4 but I imagine any iPhone would work. I'd recommend it, good luck!